IT Consultant – Tutorial
Welcome to Sprint CV,
Sprint CV is a new innovative platform that will help you describe all the details of your career and enable you to transform your data in amazing IT CVs highlighting all your IT skills, all this will be done with a push of a button.
We built this tutorial in order to help you to understand all the features of Sprint CV, we will continuously improve the tutorial with more tips on how to improve your CV.
Sections:
- Initial Step – Import CV
- Personal details
- Educational details
- Language details
- Training details
- Professional experience
- Professional experience – Add a new project
- Skills & Evaluation
- Roles & Evaluation
- CV Generator
- Profile manager
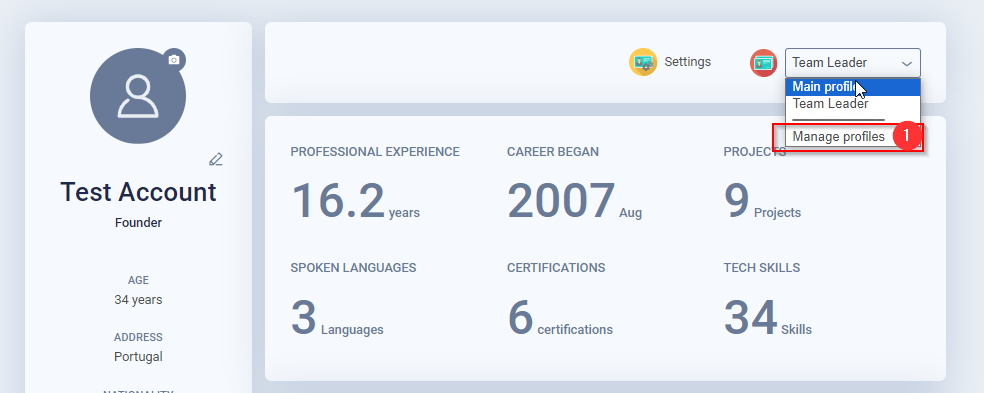
Home page
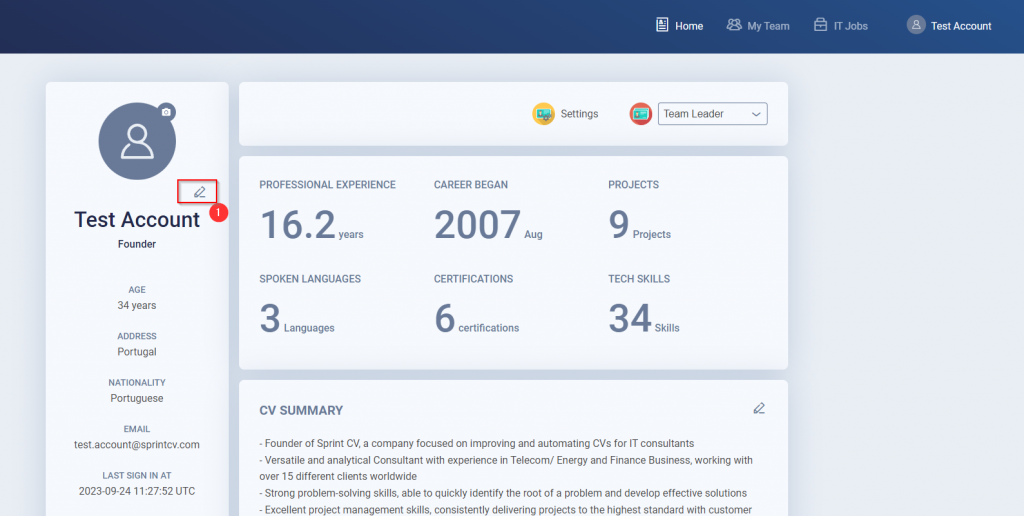
IT Consultant home, in this page you will find all the shortcuts to all the areas of Sprint CV.
- Shortcut buttons to edit your profile
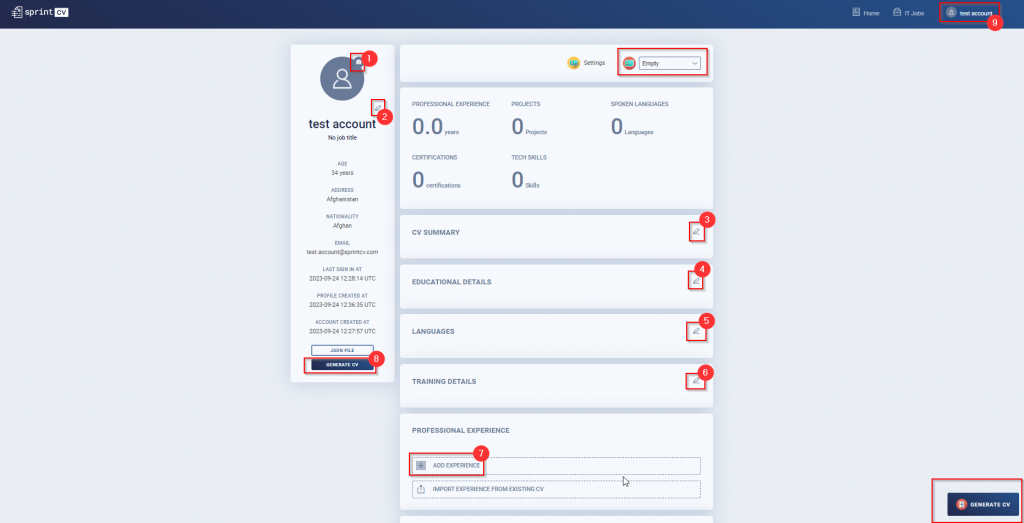
Example of an empty consultant account.
3. My account, edit your account accesses
Wizard – Welcome message / Import CV
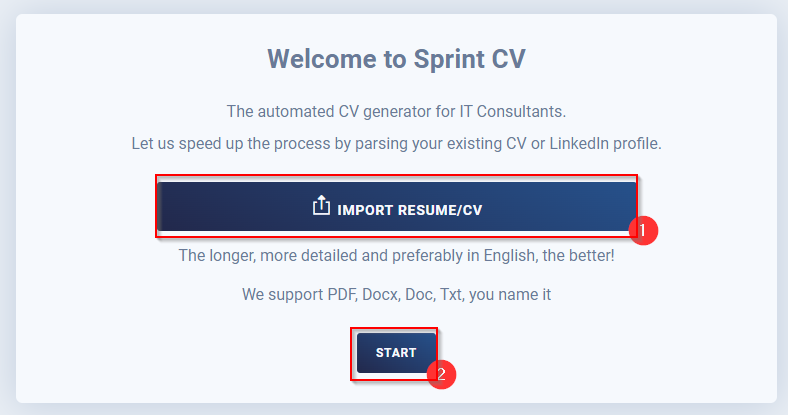
If a consultant logins for the first time and no data has been added to his profile, he will have the option to import a existing CV to preload all his account.
He will be able to import to execute this step again on the Profile manager section.
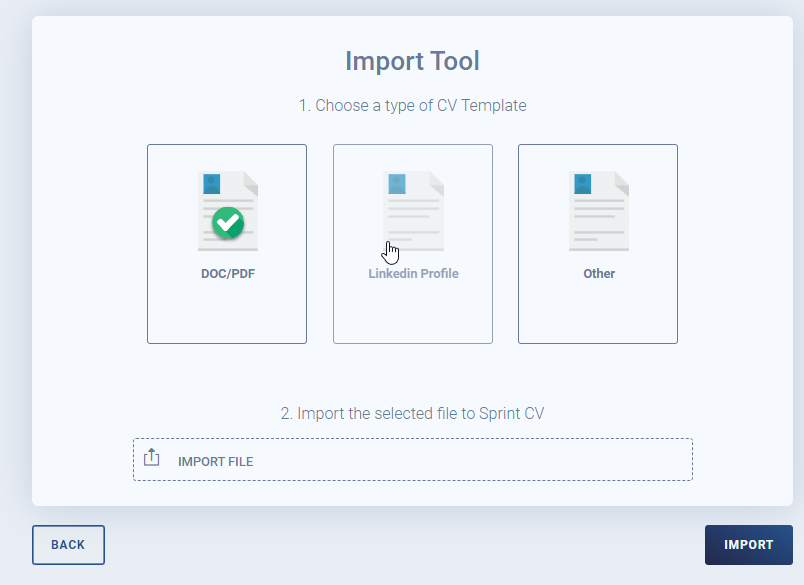
By clicking on option 1 – he will be able to import an existing CV in docx, PDF or his Linkedin profile.
By clicking on option 2- he will start an consultant account empty.
When the import/CV parsing completes a message with the results will be displayed.
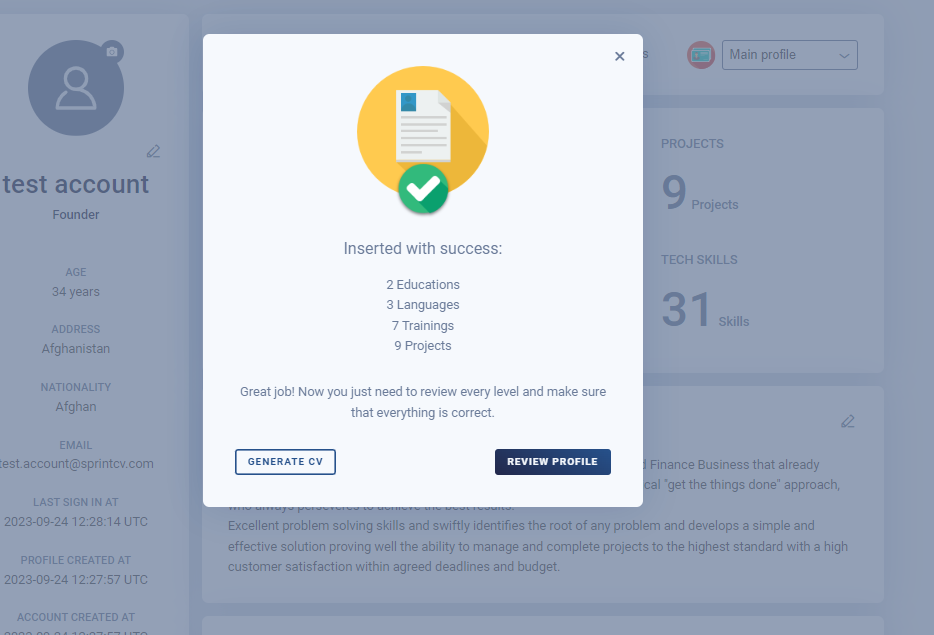
Now you can review the profile or generate a CV directly.
Wizard – Personal details
To edit your profile picture, please click here.

To edit your personal details, please click here.
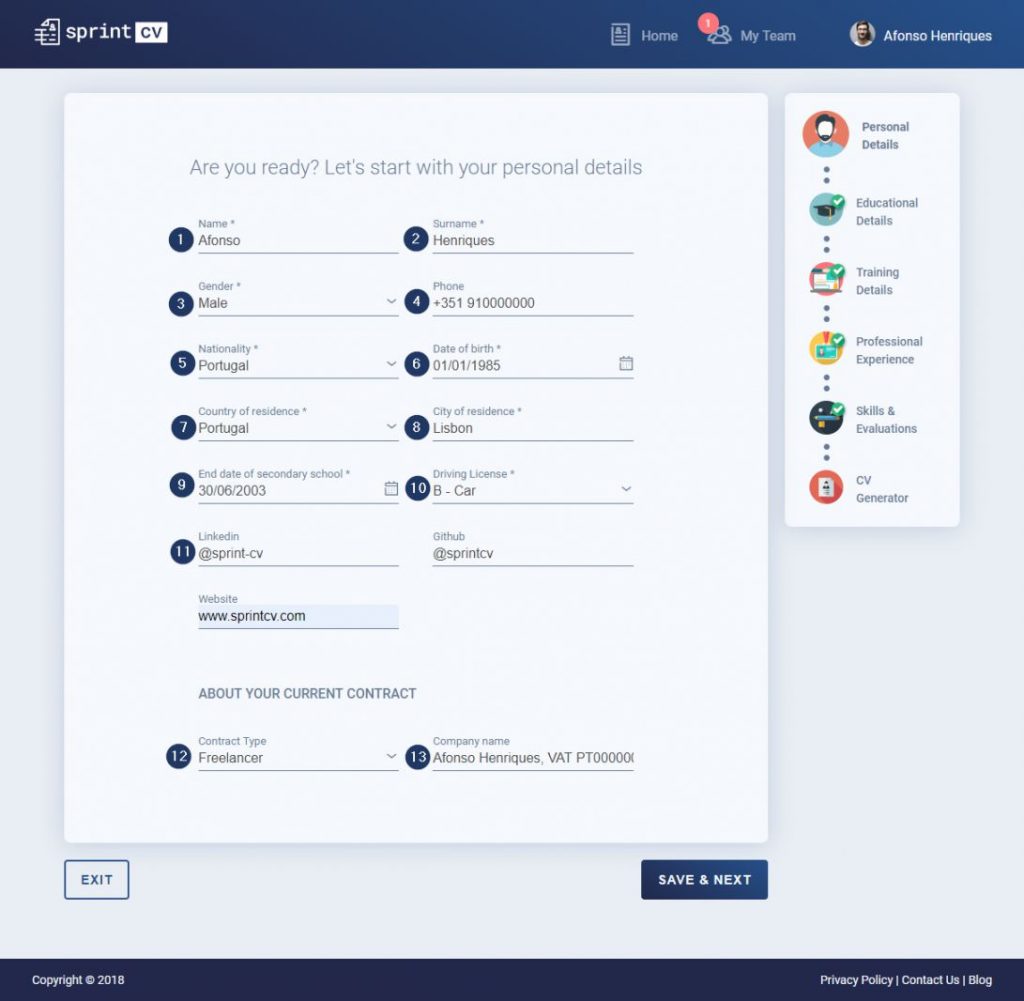
Please describe the following personal details that provide relevant information for the recruiter:
- Name
- Surname
- Gender
- Phone
- Nationality – if more than one, please select the most relevant
- Date of birth
- Country of residence
- City of residence
- End date of high school (this information is requested in CV templates like DIGIT-TM or ITS14).
- Driving License – if you are entitled to drive a Car (B), and or a Moto (A). This is requested by the Europass CV template.
- Links of your social media profiles like LinkedIn, GitHub, and your personal website or blog, if applicable
About your current contract
12. Contract type – select between Permanent, Non-permanent, Freelancer (used in templates like DIGIT-TM and ITS14). In case you are currently unemployed, we advise you to select Freelancer, since it is always better seen to be a freelancer than an unemployed.
13. Company name, in case you don’t work with any specific company, includes your name plus the fiscal number.
The information will only be saved, when you click on the button Save and Next.
All the fields marked with a *, mean that they are mandatory to be filled.
Wizard – Educational details
To edit your educational details, please click here.
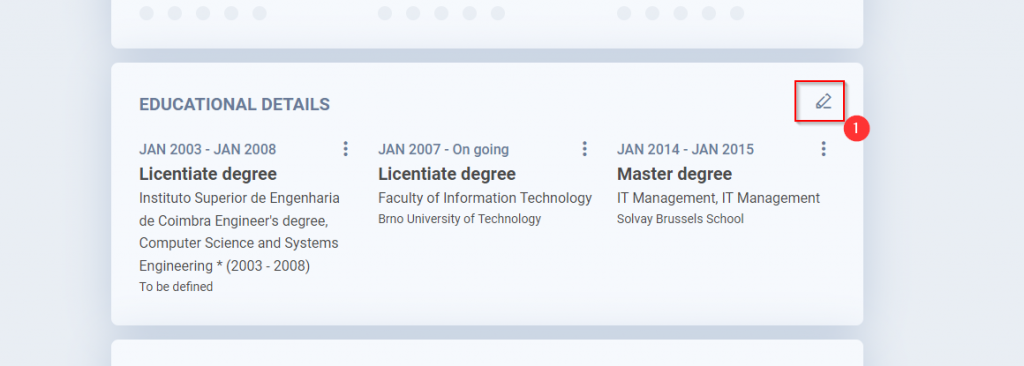
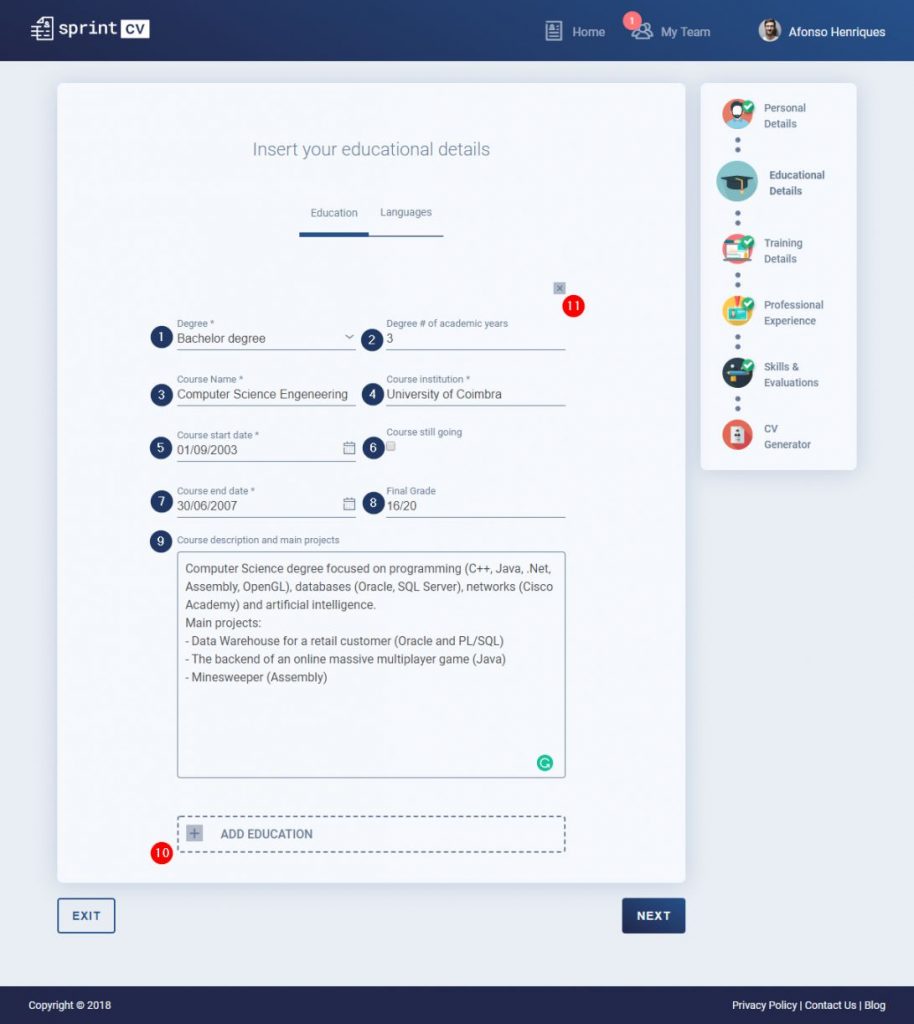
On this group, please include information about higher education degrees.
- Degree – Choose between Bachelor, Licentiate, Master, and Ph.D. Executive education (eg. Post graduations) should be included in the following section – Training Details
- Degree # of academic years – State the official number of years of that specific degree (eg if a 3-year degree took you 4 years to complete, please choose number 3)
- Course name
- Course institution
- Course Start date
- Course still going, in case the course is still ongoing, please check this check box
- End date (if applicable)
- Final Grade – Include your final score and a maximum score (eg. 17/20, 8/10, 80/100)
- Course description and main projects – Add details of your degree, like assignments and projects. Everything you consider relevant for the recruiter to know you better.
Add as many Degrees as needed by clicking on the button “Add Education” (marker 10).
You can delete an inserted Education by clicking on the cross button (marker 11).
All the fields marked with a *, mean that they are mandatory to be filled.
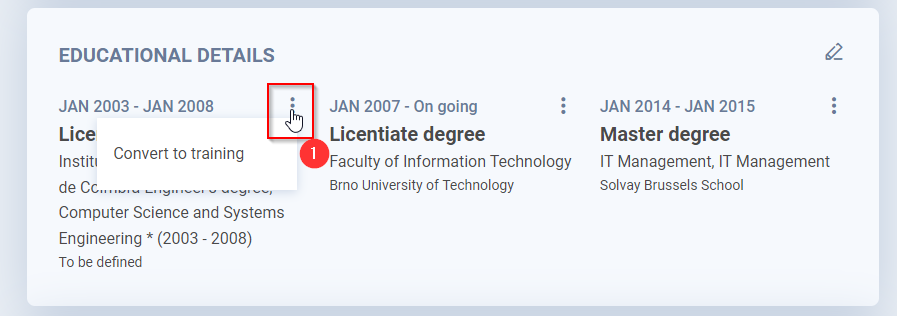
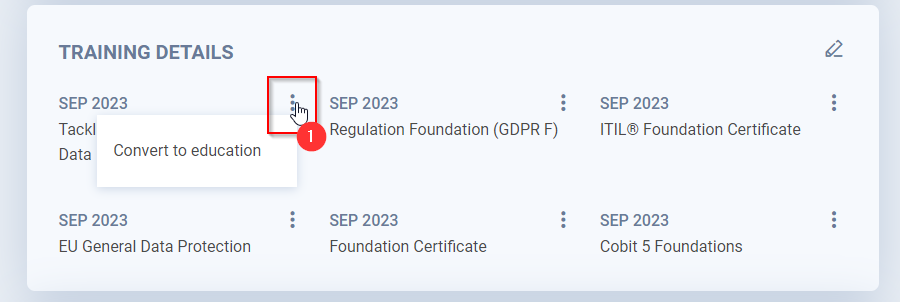
You can convert a education to a training or vice versa, by clicking on this button.
Wizard – Language details
To edit your language details, please click here.

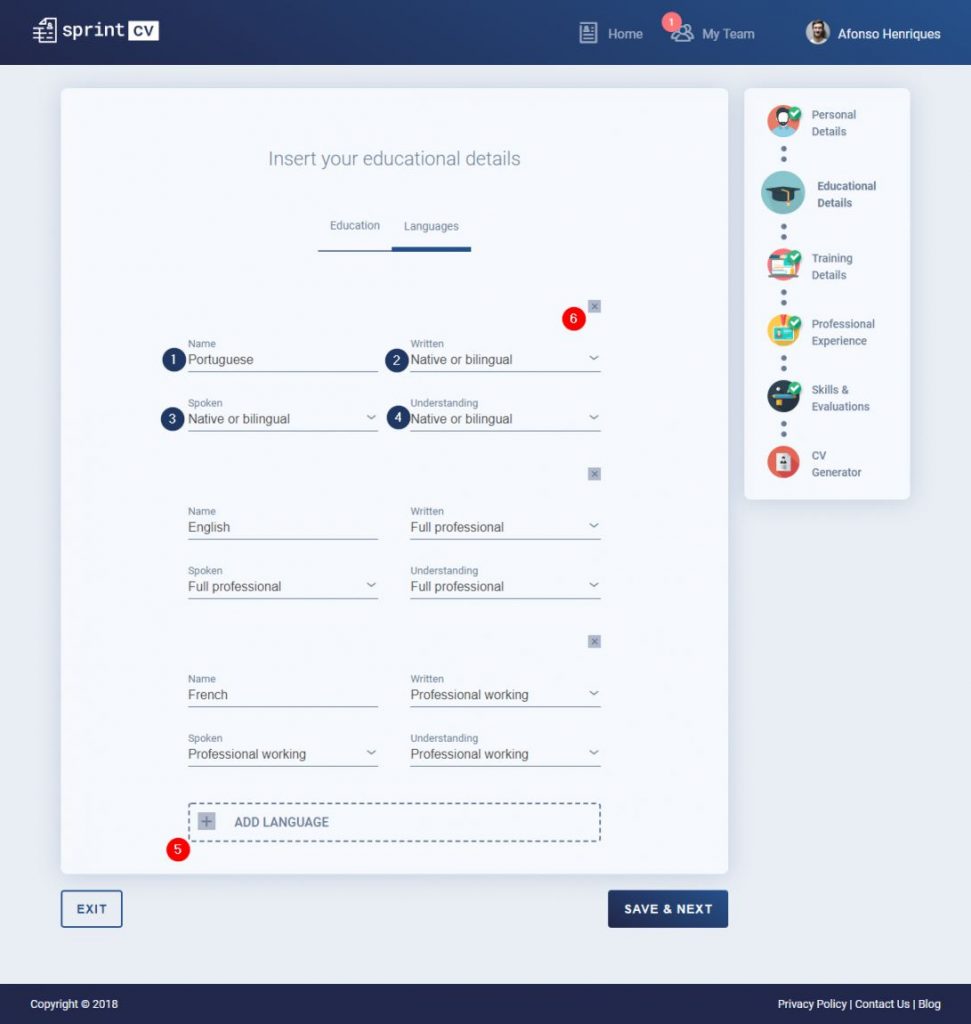
Add all the languages you are able to speak, write and understand. On each language describe your written, spoken and understanding level.
- Language name
- Language written level
- Language spoken level
- Language understanding level
5 levels available:
- Elementary – Minimum knowledge of a language. Eg. greet someone, order something basic. Until A2 equivalent on the Europass scale.
- Limited working – When you can interact with other people but it is very hard to have a conversation. B1 equivalent on the Europass scale.
- Professional working – When you can maintain a conversation and easily interact with your other people, but you need to improve and make a big effort to speak in public. C1 equivalent on the Europass scale.
- Full professional – When you can do presentations and to discuss every detail. C2 equivalent on the Europass scale.
- Native or bilingual – When it is your mother tongue or you can speak with a native speaker in any environment (social and professional).
If you wish to know more details on the Europass scale, please visit their official website. Common European Framework of Reference for Languages
Add as many languages as needed by clicking on the button “Add Language” (marker 5).
You can delete an inserted Language by clicking on the cross button (marker 6).
The information will only be saved, when you click on the button Save and Next.
Wizard – Training details
To edit your training details, please click here.
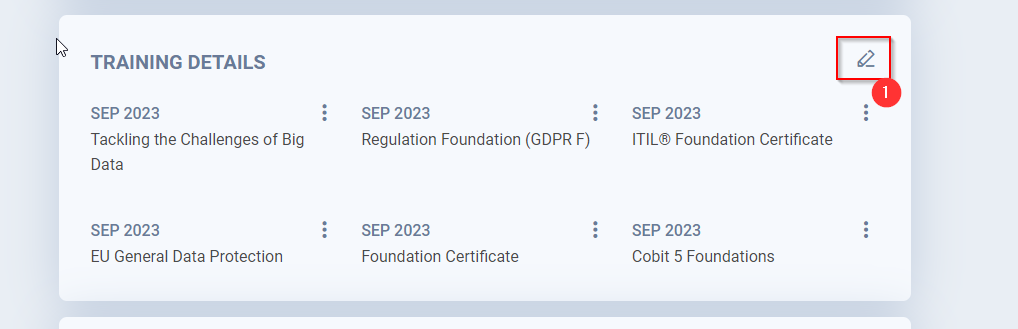
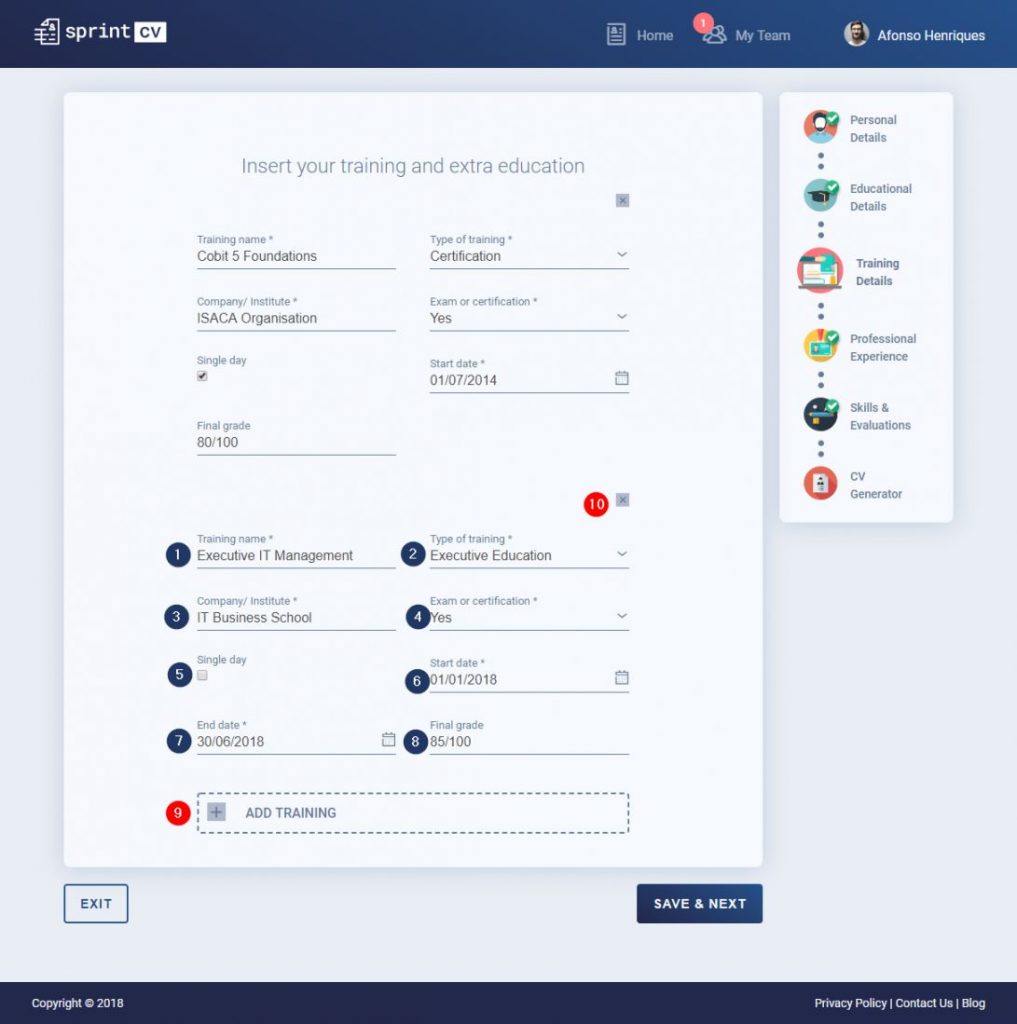
In this section add all the certifications, workshops, executive education (eg. post graduations).
- Training name
- Type of training (Course, certification, executive education, attendance, workshop)
- Training institution
- Exam or certification, if you had a final exam and/or a certificate of completion.
- Singe day training checkbox, in case the training was completed in a single day, for example, you took an online exam to pass a certification, please check this check box
- Start date
- End date (if applicable)
- Final grade (if applicable), include your final score and a maximum score (eg. 17/20, 8/10, 80/100)
Add as many training and extra education as needed by clicking on the button “Add Training” (marker 9).
You can delete an inserted Training by clicking on the cross button (marker 10).
The information will only be saved, when you click on the button Save and Next.
All the fields marked with a *, mean that they are mandatory to be filled.
You can convert a education to a training or vice versa, by clicking on this button.
Wizard – Professional experience
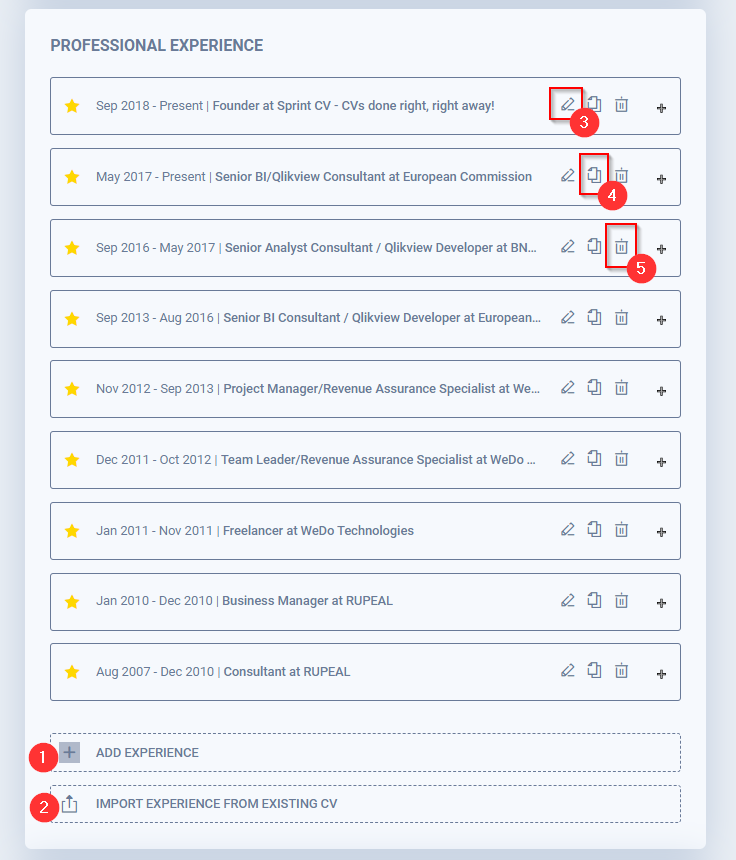
This section is considered the most important part of your CV, where you will describe all the projects you have worked on during your career and how skilled you are.
Include IT related projects and others that are relevant to be shown about you – other professional experience, academic life, side projects, volunteering, etc.
Here you will be able to:
- Add a professional experience.
- Import professional experience from an existing CV- You can import a pre-existing CV in Microsoft Word format in the following templates: Europass, DIGIT-TM, ITS-14, STIS4
- Edit a professional experience.
- Copy an existing professional experience, a copy of the selected project, this will avoid rewriting the same information again, you will only have to change what has changed.
- Delete a professional experience.
Wizard – Professional experience – Add a new professional experience
To simplify the process of describing a professional experience, we have split the process into four steps:
- Project overview
- Project Details
- Role details
- Skills details
Project overview

-
- Project name – Giving a name to the project is always important. It can be the name of the software, the consulting project or every other name that describes what you worked on
- Job title
- Client, the name of the client you worked for (if applicable)
- Client department (if applicable)
- EC Intramuros – Select if you work(ed) for the European Commission and European Institutions. To be used in DIGIT-TM and ITS14 templates that summarize the Intramuros experience.
- Rate the overall experience with the client, if you had a good interaction with the client and the business units – From zero to five stars
- Project start date
- Project still going, in case the project is still ongoing, please check this check box
- End date (if applicable)
- Main achievements – Describe your contribution to the project, how successful was the project and its impact (eg. we improved a process in 1000% or we delivered a very complex project)
Project details

-
- Team size – The number of persons involved in the project, by default is 1, just you.
- Contract type- Full-time project, part-time, volunteering, personal or academic project. This field will be used to calculate your professional experience in case of overlap.
- Country Project location – If the project happens in more than one country, include the most relevant
- City Project location – If the project happens in more than one country, include the most relevant
- Company / Employer name
- Project Industry – Every project addresses to one specific industry that is not necessarily IT (eg. Energy, Telecom, Defense, HR)
- Type of contract with your employer, if you were Freelancer, Non-permanent or permanent.
- Project type:
- Consulting project: a team of consultants delivering a solution to a client
- Outsourcing project: when you are outsourced to another company that needs to deliver a solution to a client
- Internal project: an internal project of your company and/or client.
- Project overview – Describe the big picture of the project and its mission.
Role Details
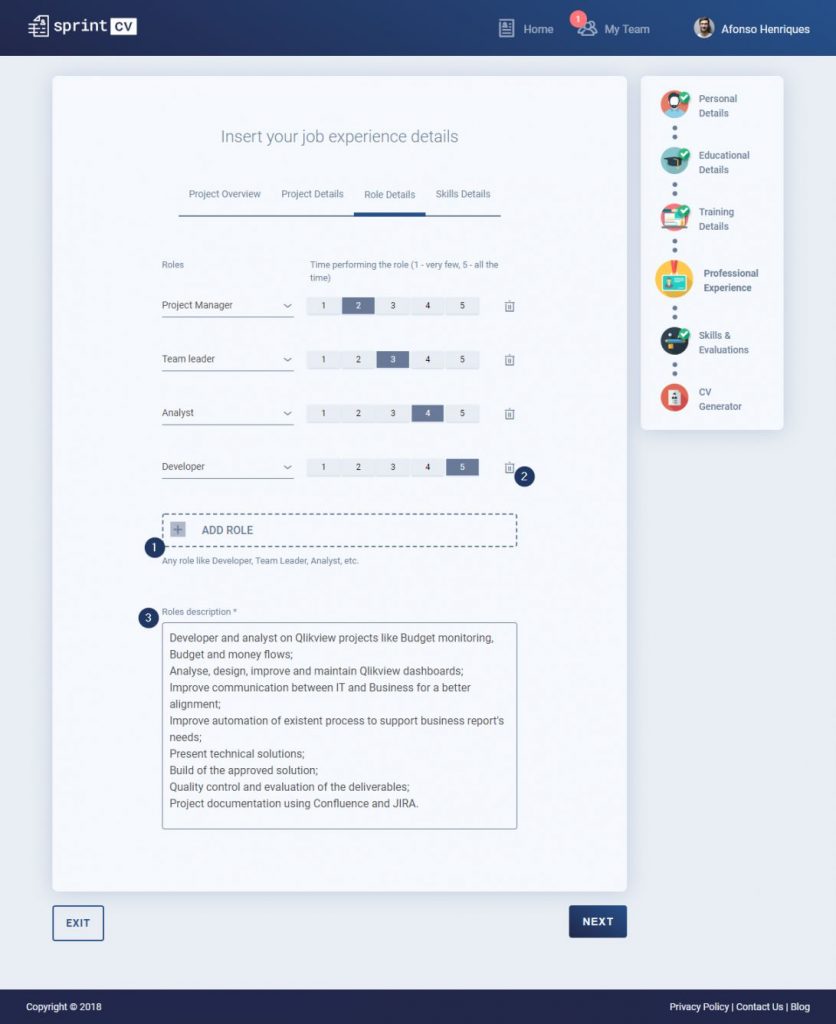
In this section, describe the role you performed and the time you spent.
- Add Role, add all the roles you had during the project
- Delete Role, click on the bin icon to delete the desired role
- Roles description, describe the roles and responsibilities that you had in the project.
Note: You should describe all the roles you had during the project. Eg. your main role was as a Developer, but you also performed tasks of Analyst, Team Leader, Trainer – include all this information since it will be aggregated in an automated summary
Skill Details

In this section, describe your skills and the time spent using it.
- Add Skills, all the skills, technologies, frameworks, methodologies used to perform a project and the time you spent using them.
- Delete Skill, click on the bin icon to delete the desired skill
Notes:
- Add all the skills, technologies, frameworks, methodologies used to perform a project and the time you spent using them.
- Sometimes a technology that you used can unblock a job opportunity
- This information will be aggregated in an automated summary
The information will only be saved when you click on the button Save and Next (marker 3).
All the fields marked with a *, mean that they are mandatory to be filled.
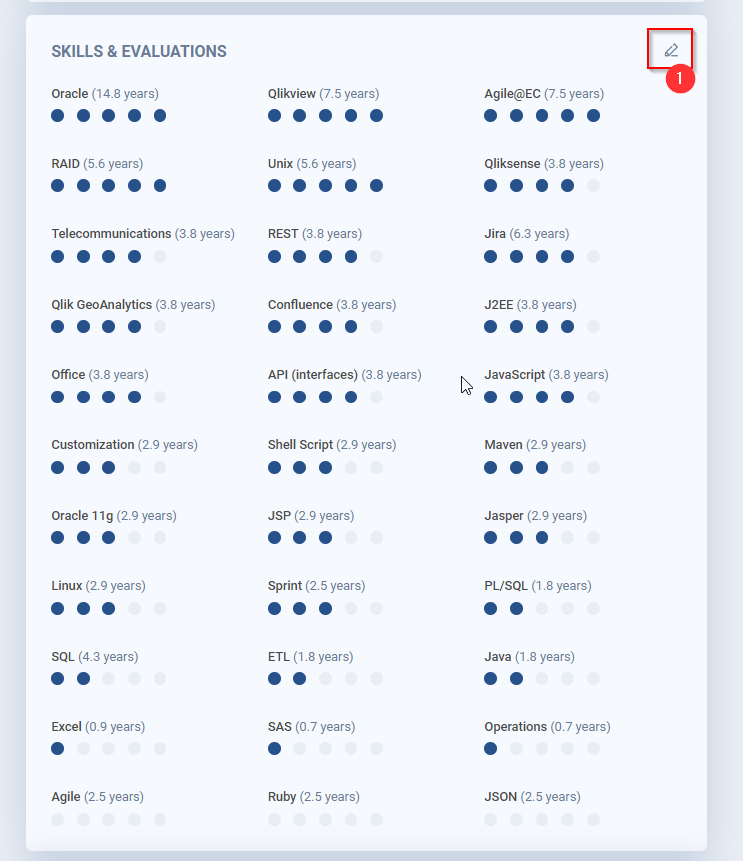
Wizard – Skills & Evaluation
In this section, you will give your auto-evaluation on your skills.
To Skills and evaluation, please click here.
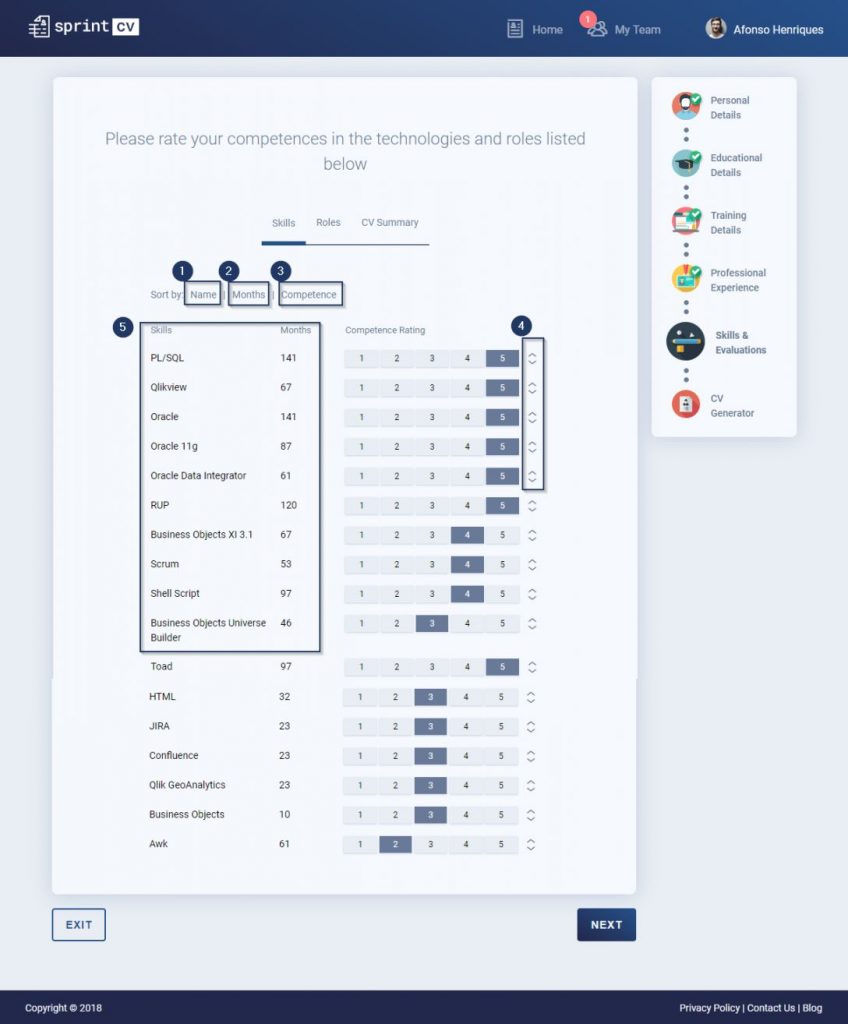
After describing your professional experience, Sprint CV aggregates your skills information that is updated monthly based on your ongoing projects. Here you should give your auto-evaluation.
You can sort the skills by:.
- Name
- Months
- Competence
- Ad-hoc, by dragging and drop the selected skill
- Top 10, the order selected will be the order used to display the skills on the CV, in many CV templates like (Sprint CV, DIGIT-TM, ITS-14) it is given a special attention to the top 10, so please make sure that the top 10 have the skills that you want to highlight.
Wizard – Roles & Evaluation
In this section, you will give your auto-evaluation on your roles.
To Roles and evaluation, please click here.
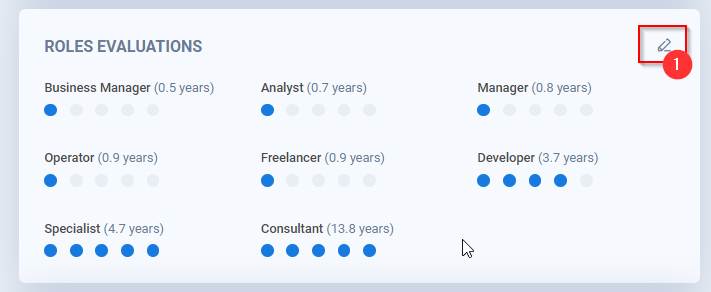
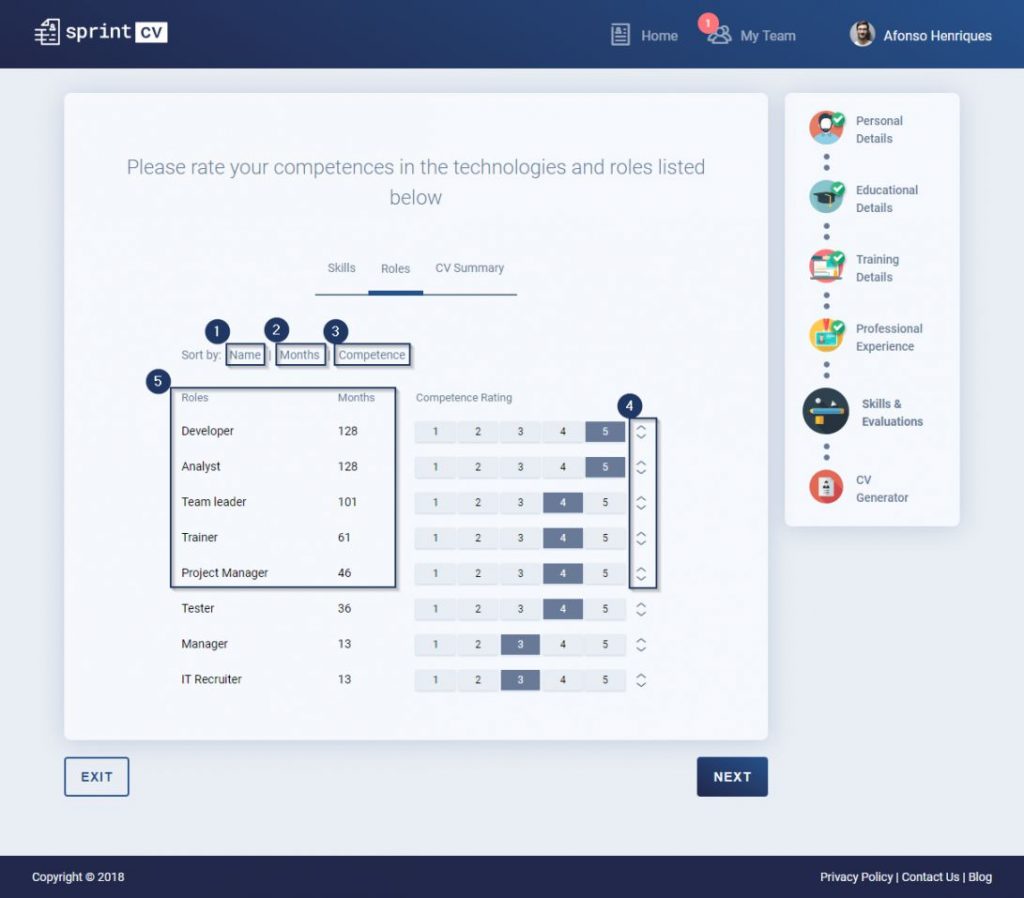
After describing your professional experience, Sprint CV aggregates your roles information that is updated monthly based on your ongoing projects. Here you should give your auto-evaluation.
You can sort the roles by Name, Months or Competence.
CV Summary
- CV summary – write a brief description of yourself, what drives you, professional experience and other relevant experience.
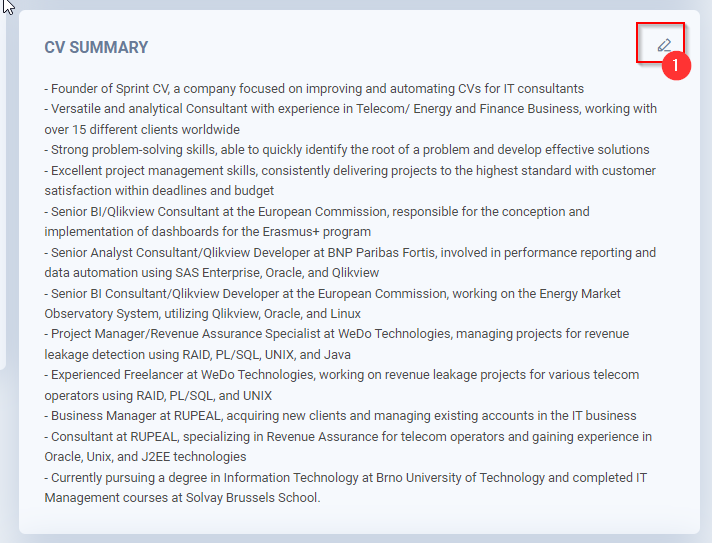
You can use the AI generator function to propose a text according to your experience.
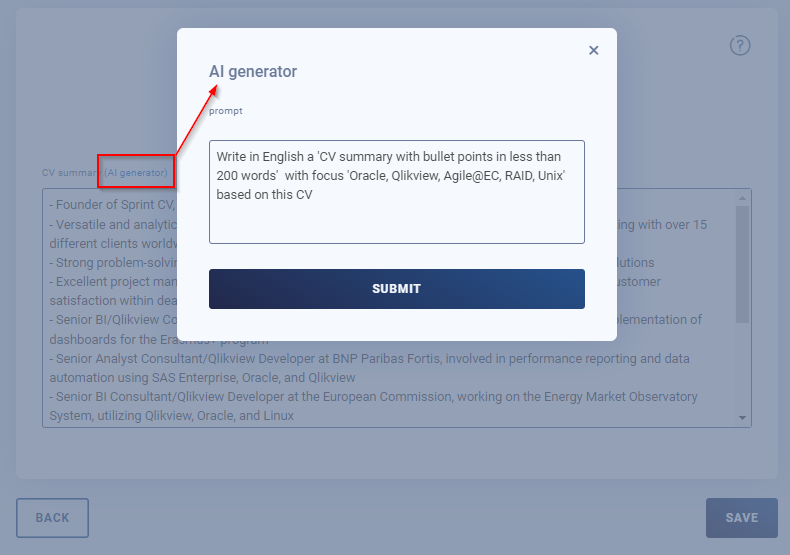
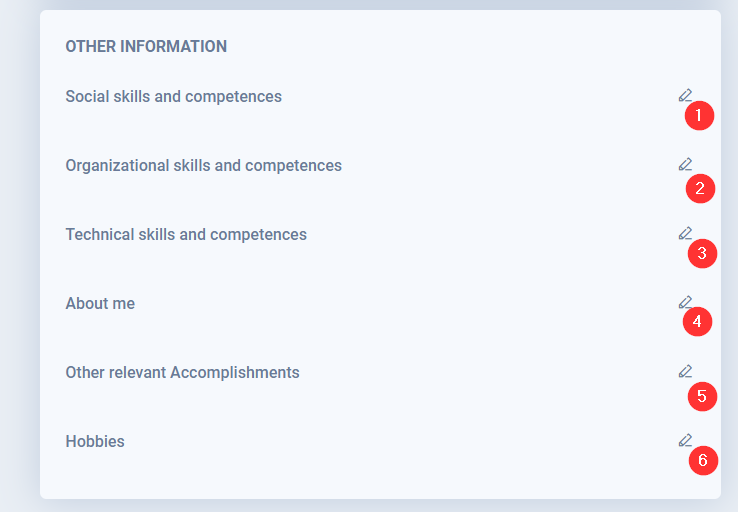
Fill the according fields and use the AI assistant to propose specific texts to each section.
- Social skills and competencies
- Organizational skills and competencies
- Technical skills and competencies
- About you, 3 sentences that describe who you are and what drives you.
- Other relevant accomplishments
- Your hobbies
Wizard – CV Generator
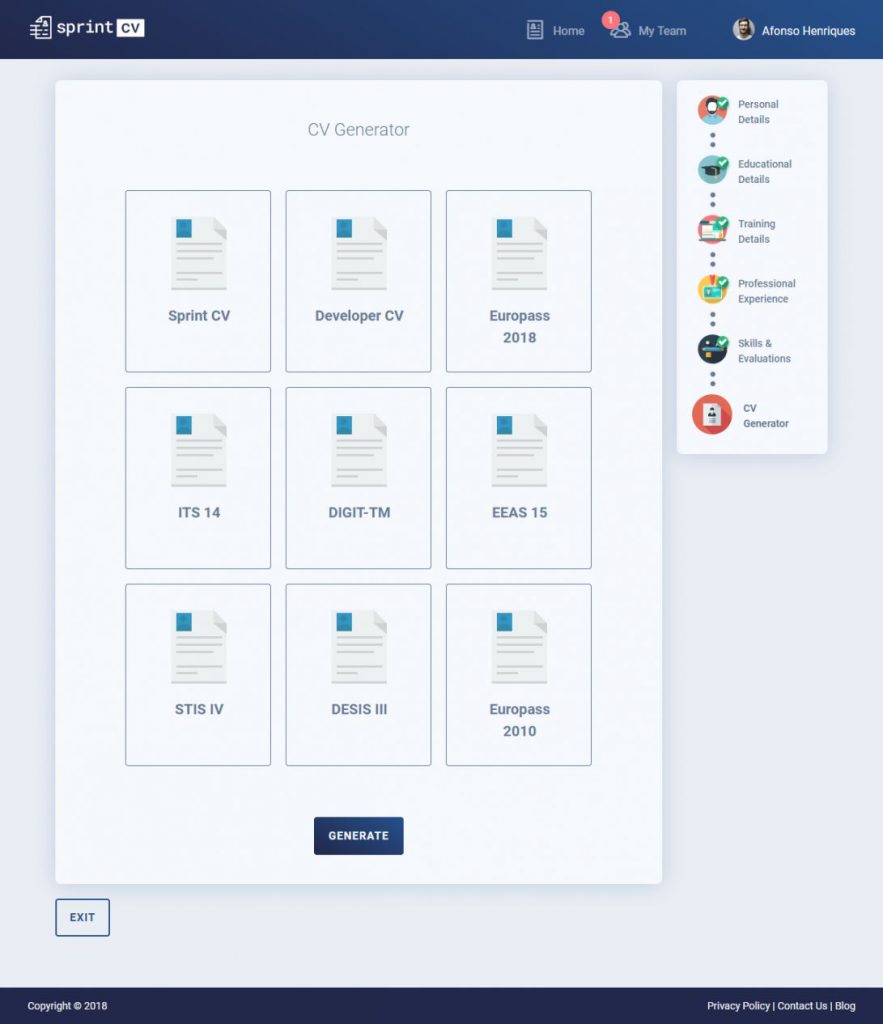
After completing every step, you can generate a CV using the CV generator. You can export your data into the following CV templates and Sprint CV will do it automatically
- Sprint CV – Our CV template suggestion
- Europass CV – Official Europass 2018
- DIGIT-TM CV – European Commission CV template for DIGIT-TM framework contract
- ITS 14 – European Parliament CV template for ITS14 framework contract
- EEAS 15 – External Action Agency CV template for EEAS15 framework contract
- STIS IV – European Commission CV template for STIS IV framework contract
- DESIS III – European Commission CV template for STIS IV framework contract
- Developer CV – Designed by Niall Maher
- Among others
Steps to generate a CV:
- Select a CV template

2. Click on Generate.
3. Fill a form regarding this specific template (optional)

4. Wait for the loading process to finish, during about 30 seconds, Sprint CV will transform your metadata into the CV template selected.
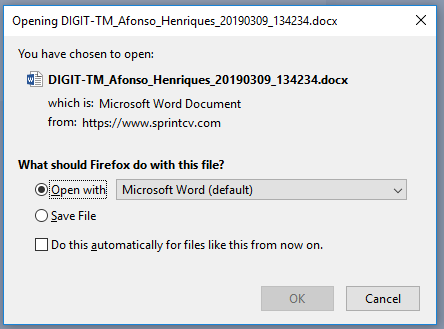
5. Save the generated file in your local PC.
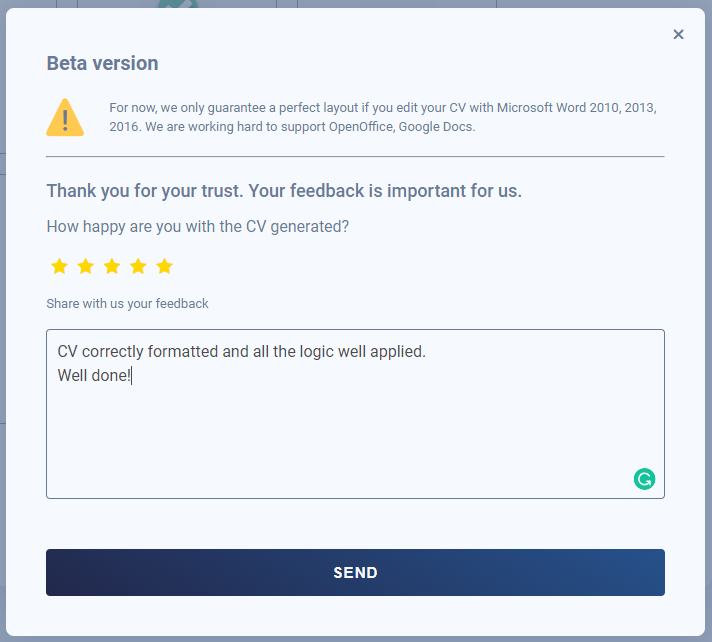
6. Share with us your feedback.
Every month your data will be updated and you can update it manually once you have a new experience to include.
Tell us about your opinion and if you find any bug or have any suggestion, please let us know.
Example of a DIGIT-TM CV being generated.
Wizard – Profile Manager
In Sprint CV, one account can have multiple profiles, because a person can be for example Developer, Team Leader, Manager or have a profile in English and other in French, all these options are manager in the profile manager.
Please click on Manage profiles
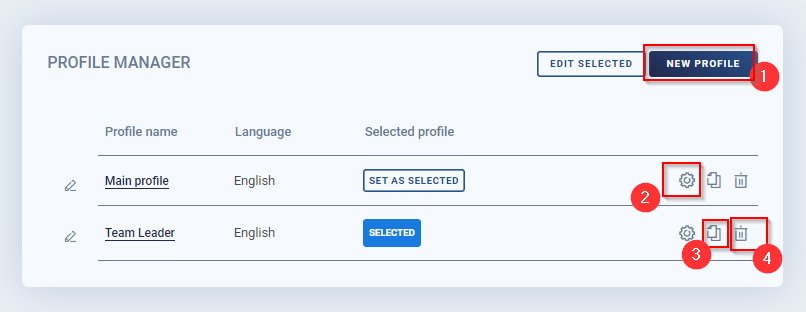
The following options are available.
- New profile, create a new profile that can be based on a copy of other profile, running the AI assistant, importing a new CV, etc.
- Change the settings of a profile, change the name or language.
- Copy a profile
- Delete a profile
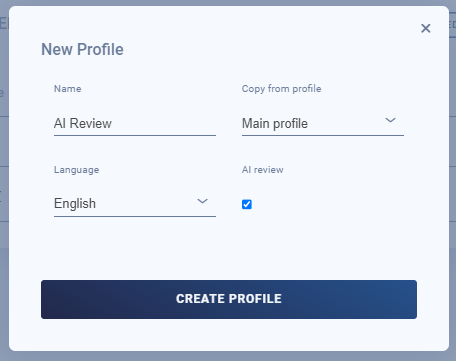
New Profile running the AI Assistant
Many times, is very useful to create a new profile executing the AI assistant that will review every single text of the existing profile.
For this given example, the AI review will be executed on the existing profile “Main Profile”, the new profile will be called “AI Review” and will be in English.
The process will run on the background and an email will be send when the profile is ready.
New Profile that will be translated in a new language using the AI Assistant
Many times, is very useful to create a new profile in a new language, for example French using the AI assistant that will translate every single text of the existing profile to the new language.
For this given example, the AI review will be executed on the existing profile “Main Profile”, the new profile will be called “AI Review” and will be in English.
![]()
New Profile using a different CV
It is useful to create a new profile based on a different CV, if the initial CV gave some bad results on the import CV step.
For example the original CV of the consultant has very few data and his Linkedin CV is more complete.

My account
On my account you can do many different actions over your profile like:
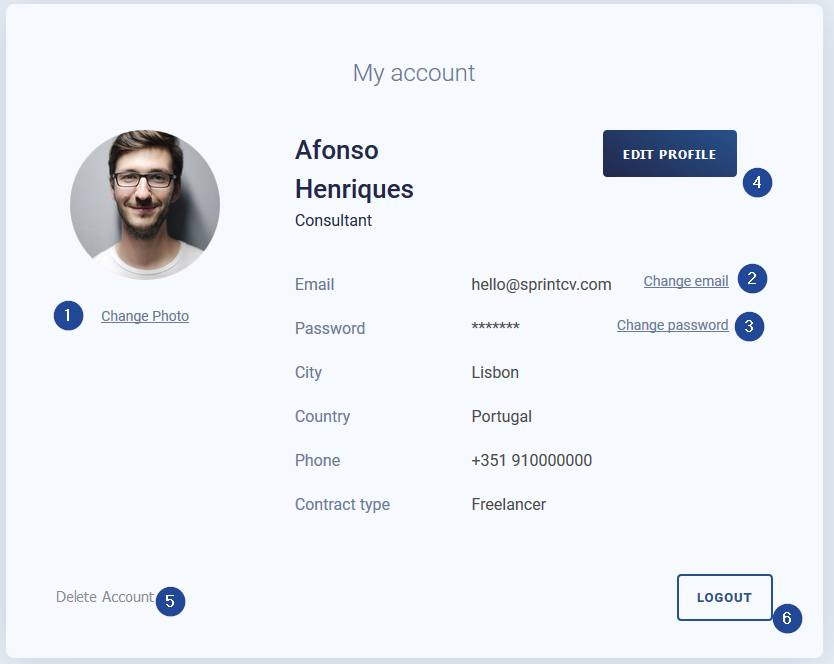
- Change your profile’s photo
- Change your profile’s email, a confirmation email will be sent to the new email, only after it is confirmed the email change will be enabled
- Change your profile’s password
- Edit your personal details
- Delete your account
- Logout